 Doomsday Book by Connie Willis is a book I've been meaning to read ever since I finished her Blackout/All Clear duology. I was surprised but pleased to find out that this book takes place in the same universe as Blackout/All Clear. Unfortunately that also means that I had a very good idea how the time travel plot would play out. It won the Hugo and Nebula awards back in 1993 so I came into it with high expectations considering the other Hugo/Nebula winners I can think off the top of my head are Dune, Ender's Game, Neuromancer, American Gods, The Windup Girl and the afore mentioned Blackout/All Clear. Sadly it didn't live up to my high expectations even though it is a pretty darn good book. Doomsday Book by Connie Willis is a book I've been meaning to read ever since I finished her Blackout/All Clear duology. I was surprised but pleased to find out that this book takes place in the same universe as Blackout/All Clear. Unfortunately that also means that I had a very good idea how the time travel plot would play out. It won the Hugo and Nebula awards back in 1993 so I came into it with high expectations considering the other Hugo/Nebula winners I can think off the top of my head are Dune, Ender's Game, Neuromancer, American Gods, The Windup Girl and the afore mentioned Blackout/All Clear. Sadly it didn't live up to my high expectations even though it is a pretty darn good book.In 2048 we are able to send people back into the past to observe things. Our historian Kivrin is about to travel back to the 14th century to observe contemporary life. Unfortunately, the technician who is to send her back to the past falls prey to a 21st century disease and she ends up smack dab in the middle of the black plague. We are left with parallel stories of how the people of the 14th and 21st centuries deal with epidemics. |
 The Best of Down Goes Brown by Sean McIndeo is hilarious. By the time I was on page 6 I had already laughed out loud on 4 separate occasions. Honestly this book is worth the purchase price if you only ever read "A Look Back at Game Seven of the 2011 Stanley Cup Final (which, due to a scheduling error, had to be published twelve hours early)" which is one of the best piece of satirical writing I've ever read. Seems like a great gift for that hockey lover in your life and I thoroughly enjoyed every chapter. The Best of Down Goes Brown by Sean McIndeo is hilarious. By the time I was on page 6 I had already laughed out loud on 4 separate occasions. Honestly this book is worth the purchase price if you only ever read "A Look Back at Game Seven of the 2011 Stanley Cup Final (which, due to a scheduling error, had to be published twelve hours early)" which is one of the best piece of satirical writing I've ever read. Seems like a great gift for that hockey lover in your life and I thoroughly enjoyed every chapter.I'm now a follower of the blog and twitter feed. |

Friday, November 16, 2012
Books I've Read This Week


Monday, November 12, 2012
Building a Native Context Menu for PhoneGap Android

So when I talk about a native context menu I mean the menu that clicks when you do a long press on an Android device. Again this is well covered on the Android Developer page. Here is an example of an context menu from the Contacts app:

The first step in creating the menu is to define it in XML. My recommendation is to create a menu folder under the res folder in your Android Eclipse project. Then you create a new File with an XML extension. For this post I'll call mine example.xml. When you're done your res folder should look something like this:

Don't worry about the red X's as we haven't edited the XML file yet so it is going to complain about a premature end of file. For a real good description of what goes into a menu XML file read this. For our purposes I'm just going to give you the XML to paste into the file:
But when you view the file in Eclipse you'll still see errors:

and that is to be expected as we haven't added the two images to the drawables folder nor have we added our two new strings to strings.xml. To fix these issues first download these two images:


and copy them to your projects res/drawable-hdpi folder. When you want to put out a professional application you'll need to provide icons of various sizes but the above is enough for our needs.
To fix the rest of the red X's you'll need to open the res/values/strings.xml and add two new Strings. The first should have the name "settings" and a value of "Settings. The second should have the name"help" and, predictably, the value of "Help". At this point all the red X's from example.xml and from the res folder hierarchy should have disappeared.

If they haven't, well then you've done something wrong and should probably go back over all the steps to make sure you haven't missed anything.
Okay, so now we've got all the resources in place. Let's go write some actual Java code. Don't worry much of it will be cut and paste. In Eclipse open up your main Java class, you know the one that extends DroidGap.
First you'll need to register the context menu in the onCreate method. Basically, you'll need to add the call to registerForContextMenu to your onCreate method:
Secondly we'll need to tell your application what to do when it detects a long press. You'll need to paste the following code into you main Java class:
The last bit of code you need to add is a method that will tell your application what to do when the individual menu items are clicked. Here's some example code:
When you click on the Setting button we'll use an Android intent to load the devices Settings panel. If you click on the Help button then we'll execute some JavaScript code. That's it! You don't need to add anything to your HTML/JS code to get a native Android context menu working with your PhoneGap application. Here is what it would look like:

Please note, I'm just providing a quick example and you are not limited to how you handle the menu button clicks in the least. You may want to handle it in Java and do something that you can't do in JavaScript or you may want to call a JavaScript function on your page to have your UI react in some interesting way.
So, there you go. The process is nearly identical to creating an options menu that I described in my previous post. I promise that in my next post I'll show you how to handle everything in HTML and JavaScript!
Friday, November 9, 2012
Books I've Read This Week
 The Happiness Project by Gretchen Rubin is not the usual type of book I read. Honestly, I have a lot of things to be thankful for. I've got my health, I'm married to an amazing woman, we have a great child, I'm gainfully employed in a job that I actually enjoy but I'm not sure you could call me a happy person. Ernest Hemmingway once said "Happiness in intelligent people is the rarest thing I know." and I identify with that statement. My mind is always running thinking of ways to make things better or thinking of what else needs to be done. The Happiness Project by Gretchen Rubin is not the usual type of book I read. Honestly, I have a lot of things to be thankful for. I've got my health, I'm married to an amazing woman, we have a great child, I'm gainfully employed in a job that I actually enjoy but I'm not sure you could call me a happy person. Ernest Hemmingway once said "Happiness in intelligent people is the rarest thing I know." and I identify with that statement. My mind is always running thinking of ways to make things better or thinking of what else needs to be done.So, that's why I was attracted to the Happiness Project. I enjoyed reading the book and what I've really taken from it is just to let go of things. I lead an incredibly blessed life and I should not let the little things bother me quite so much. The book is quite well written in a light tone. It's organized in months where each month focuses on a particular way to improve one's happiness. This makes a lot of sense as it is hard to make new positive habits if you are trying to focus on too many things. |
Thursday, November 8, 2012
My PhoneGap Plugins Have Moved

So you can now find my plugins at:
Tuesday, November 6, 2012
Building a Native Menu with PhoneGap Android
So when I talk about a native menu I mean an Android options menu and a lot of the information I'm going to give you is covered very well on this Android Developer page but what I'm going to do is help show you where to add the hooks into your PhoneGap application. Here is an example of an options menu from the Contacts app:

The first step in creating the menu is to define it in XML. My recommendation is to create a menu folder under the res folder in your Android Eclipse project. Then you create a new File with an XML extension. For this post I'll call mine example.xml. When your're done your res folder should look something like this:
Don't worry about the red X's as we haven't edited the XML file yet so it is going to complain about a premature end of file. For a real good description of what goes into a menu XML file read this. For our purposes I'm just going to give you the XML to paste into the file:
But when you view the file in Eclipse you'll still see errors:
and that is to be expected as we haven't added the two images to the drawables folder nor have we added our two new strings to strings.xml. To fix these issues first download these two images:
and copy them to your projects res/drawable-hdpi folder. When you want to put out a professional application you'll need to provide icons of various sizes but the above is enough for our needs.
To fix the rest of the red X's you'll need to open the res/values/strings.xml and add two new Strings. The first should have the name "settings" and a value of "Settings. The second should have the name"help" and, predictably, the value of "Help". At this point all the red X's from example.xml and from the res folder hierarchy should have disappeared.
If they haven't, well then you've done something wrong and should probably go back over all the steps to make sure you haven't missed anything.
Okay, so now we've got all the resources in place. Let's go write some actual Java code. Don't worry much of it will be cut and paste. In Eclipse open up your main Java class, you know the one that extends DroidGap.
First we'll need to tell your application what to do when it detects that the menu button has been pressed. You'll need to paste the following code into you main Java class:
The second bit of code you need to add is a method that will tell your application what to do when the individual menu items are clicked. Here's some example code:
When you click on the Setting button we'll use an Android intent to load the devices Settings panel. If you click on the Help button then we'll execute some JavaScript code. That's it! You don't need to add anything to your HTML/JS code to get a native Android options menu working with your PhoneGap application. Here is what it would look like:

Please note, I'm just providing a quick example and you are not limited to how you handle the menu button clicks in the least. You may want to handle it in Java and do something that you can't do in JavaScript or you may want to call a JavaScript function on your page to have your UI react in some interesting way.
In my next post I'll show you the reverse. How to handle everything in HTML and JavaScript!
Monday, November 5, 2012
My WD MyBook Live Crashed

This is the second time a WD enclosure has failed on me. Why, oh why, do I do this to myself. I guess it is because I'm cheap and the WD products offer a good price/functionality ratio. However, what they do not offer is reliability. This is a good lesson for us all not to skimp on quality when you have an important piece of your home setup.
I guess I should explain that I use the MyBook Live to host my iTunes library. As a result it is just packed with shows for my daughter and I really need to get this fixed before she wants to watch Beverly Hills Chihuahua again. As well this drive is setup to be the receptacle of the Time Machine backup on the Mac. I get antsy if my backup isn't running daily even though I also run Carbonite to backup to the cloud.
Anyway, the drive in the enclosure is just fine. I pulled it out and popped it into SATA to USB which works great except for the fact the drive is formatted as XFS. It's a typical Linux file system which predictably isn't recognized by Mac OS or Windows. Luckily there is a great free program called Linux Reader from Disk Internals that you can run on Windows which will allow you read only access to the partitions. I've got it setup on an old Windows laptop now and it is busily copying away.
Friday, November 2, 2012
Support Canadian Comic Book Creators
 Extremely talented Canadian comic book creators have put together an IndiGoGo campaign to self publish a 100 page hard cover anthology of comic stories. They are looking to raise $20,000 by November the 5th and are currently just shy of $13,000. If you love comics then this will be a great anthology to pick up. There are perks levels from $5 to $300 so they are making it so easy for you to find a contribution level you are comfortable with.
Who are they? Well there is...
Adrian Alphona

Andy Belanger

J. Bone

Jack Briglio

Scott Chantler

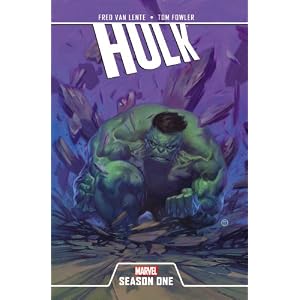
Tom Fowler
Agnes Garbowska she drew one of my childhood favourites Spider-Ham but I can't get the image to load.
Faith Erin Hicks I recently read all her books.
Tim Levins
Ramon Perez
Ron Salas
Jay Stephens
J. Torres
Howard Wong
I will add images for the rest of these folks as I have time but really you shouldn't need anymore convincing. Go contribute!
Subscribe to:
Posts (Atom)